
This guide targets the new DX11 rendering engine for rFactor 2, but in general all the advice given here will also work for the existing DX9 engine. All existing shaders that come with the simulation are also available to DX11. What follows below are guidelines to convert your work to render as nice as possible with the new engine.
Car Art
- Albedo maps are now mandatory; with the PostFX integration we are now forced to balance our diffuse maps to work as Albedo Maps
- Dashboards LCDs / MoTeC;
- Use a new shader called DashboardElementShader.
- Set Ambient Color to Black.
- Set Emissive Color from Black to White to get more or less emissive properties.
- Rev Meters / LEDs;
- Use a new shader called DashboardElementShader.
- Set Ambient Color to Black.
- Set Emissive Color from Black to White to get more or less emissive properties.
- Tail Lights; Use shader with 100% Emissive – Diffuse map for the Light ON must be strong in terms of saturation and brightness to engage the bloom.
- Headlights; Create a mesh, with the shape of the bulb reflector (can be even a flat cap), and map it with the glow texture we provided in the sample, using the HighSunLum shader. Export this as glow mesh so it will be loaded when headlights are ON. Do not use any “fake” glow mesh or custom shader as we were doing in the past. It is VERY important to note that the size of the PostFX glow mesh has to be, at least, as big as the headlight reflector bell outer ring. Do not create small mesh, unless you don’t want to simulate led lights, or specific shapes. If you want solid and strong headlight effect just be sure to create glow disks as big as your headlight reflector bells, on the outer and larger diameter.
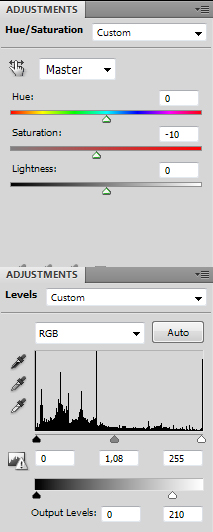
- Color Gamut; let’s limit the saturation and brightness of your albedo map, to average 85%, max 90 for pretty strong colors. Never use anything above that range. If you have old textures you want to quick fix, you can try applying a Level layer and dropping the OUT from 255 to 200.
- Normal Maps; normal maps are more data files than art, so they should be exported non-compressed to avoid glitches in the spatial/color information. We will give you all details about formats and schemes, once we moved to the engine optimization tasks.
- Atlas textures as much as you can; if you have many small texture with similar material attributes, try to atlas them into a singular material, averaging shader settings to a good compromise. This will improve performance reducing overall drawcalls.
- Try to use real time texture formats as much as you can; try to limit the usage of TGAs to just system/target files, and use .DDS/BC for the entire main art. We will give you a complete set of optimized DX11 texture formats as soon as we move to the DX11 optimization task.
- How to quickly update car skins / color maps; Open your file in Photoshop. On top of all layers add these two FX layers:
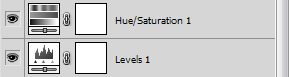
They will be used to lower the white output and the global color saturation. Here is the skin before using the two FX layers:
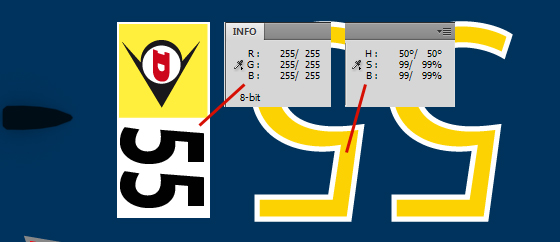
and here is the same skin with the FX layers setup:
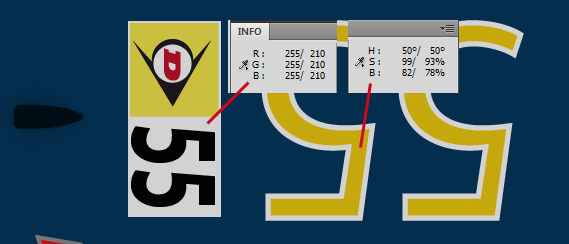
With these settings being used:
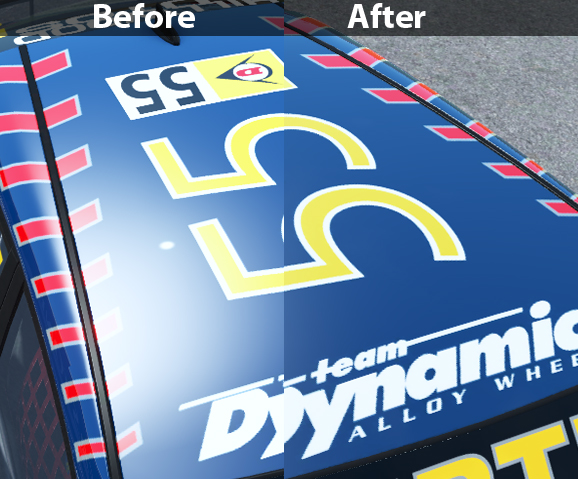
And finally, here is a preview of the skin in-game, before and after the fix:
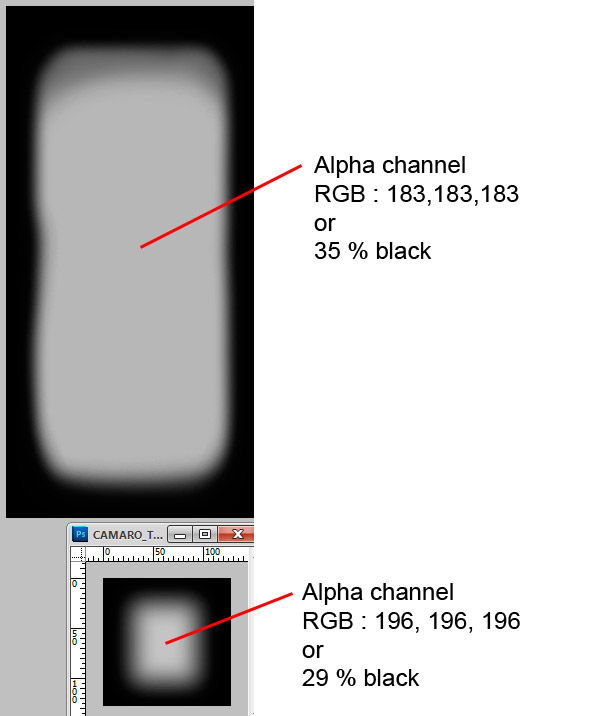
- Undercar Shadows; here is an example of alpha channel values for undercar shadows texture map. These values can vary regarding the ride height of the car modeled (far from the ground or close to the ground). The big map above is the car body shadow, the little one below is the wheel shadow.
Basic 3D Studio Max Scene for Cars
Click to download the sample scene for cars
Track Art
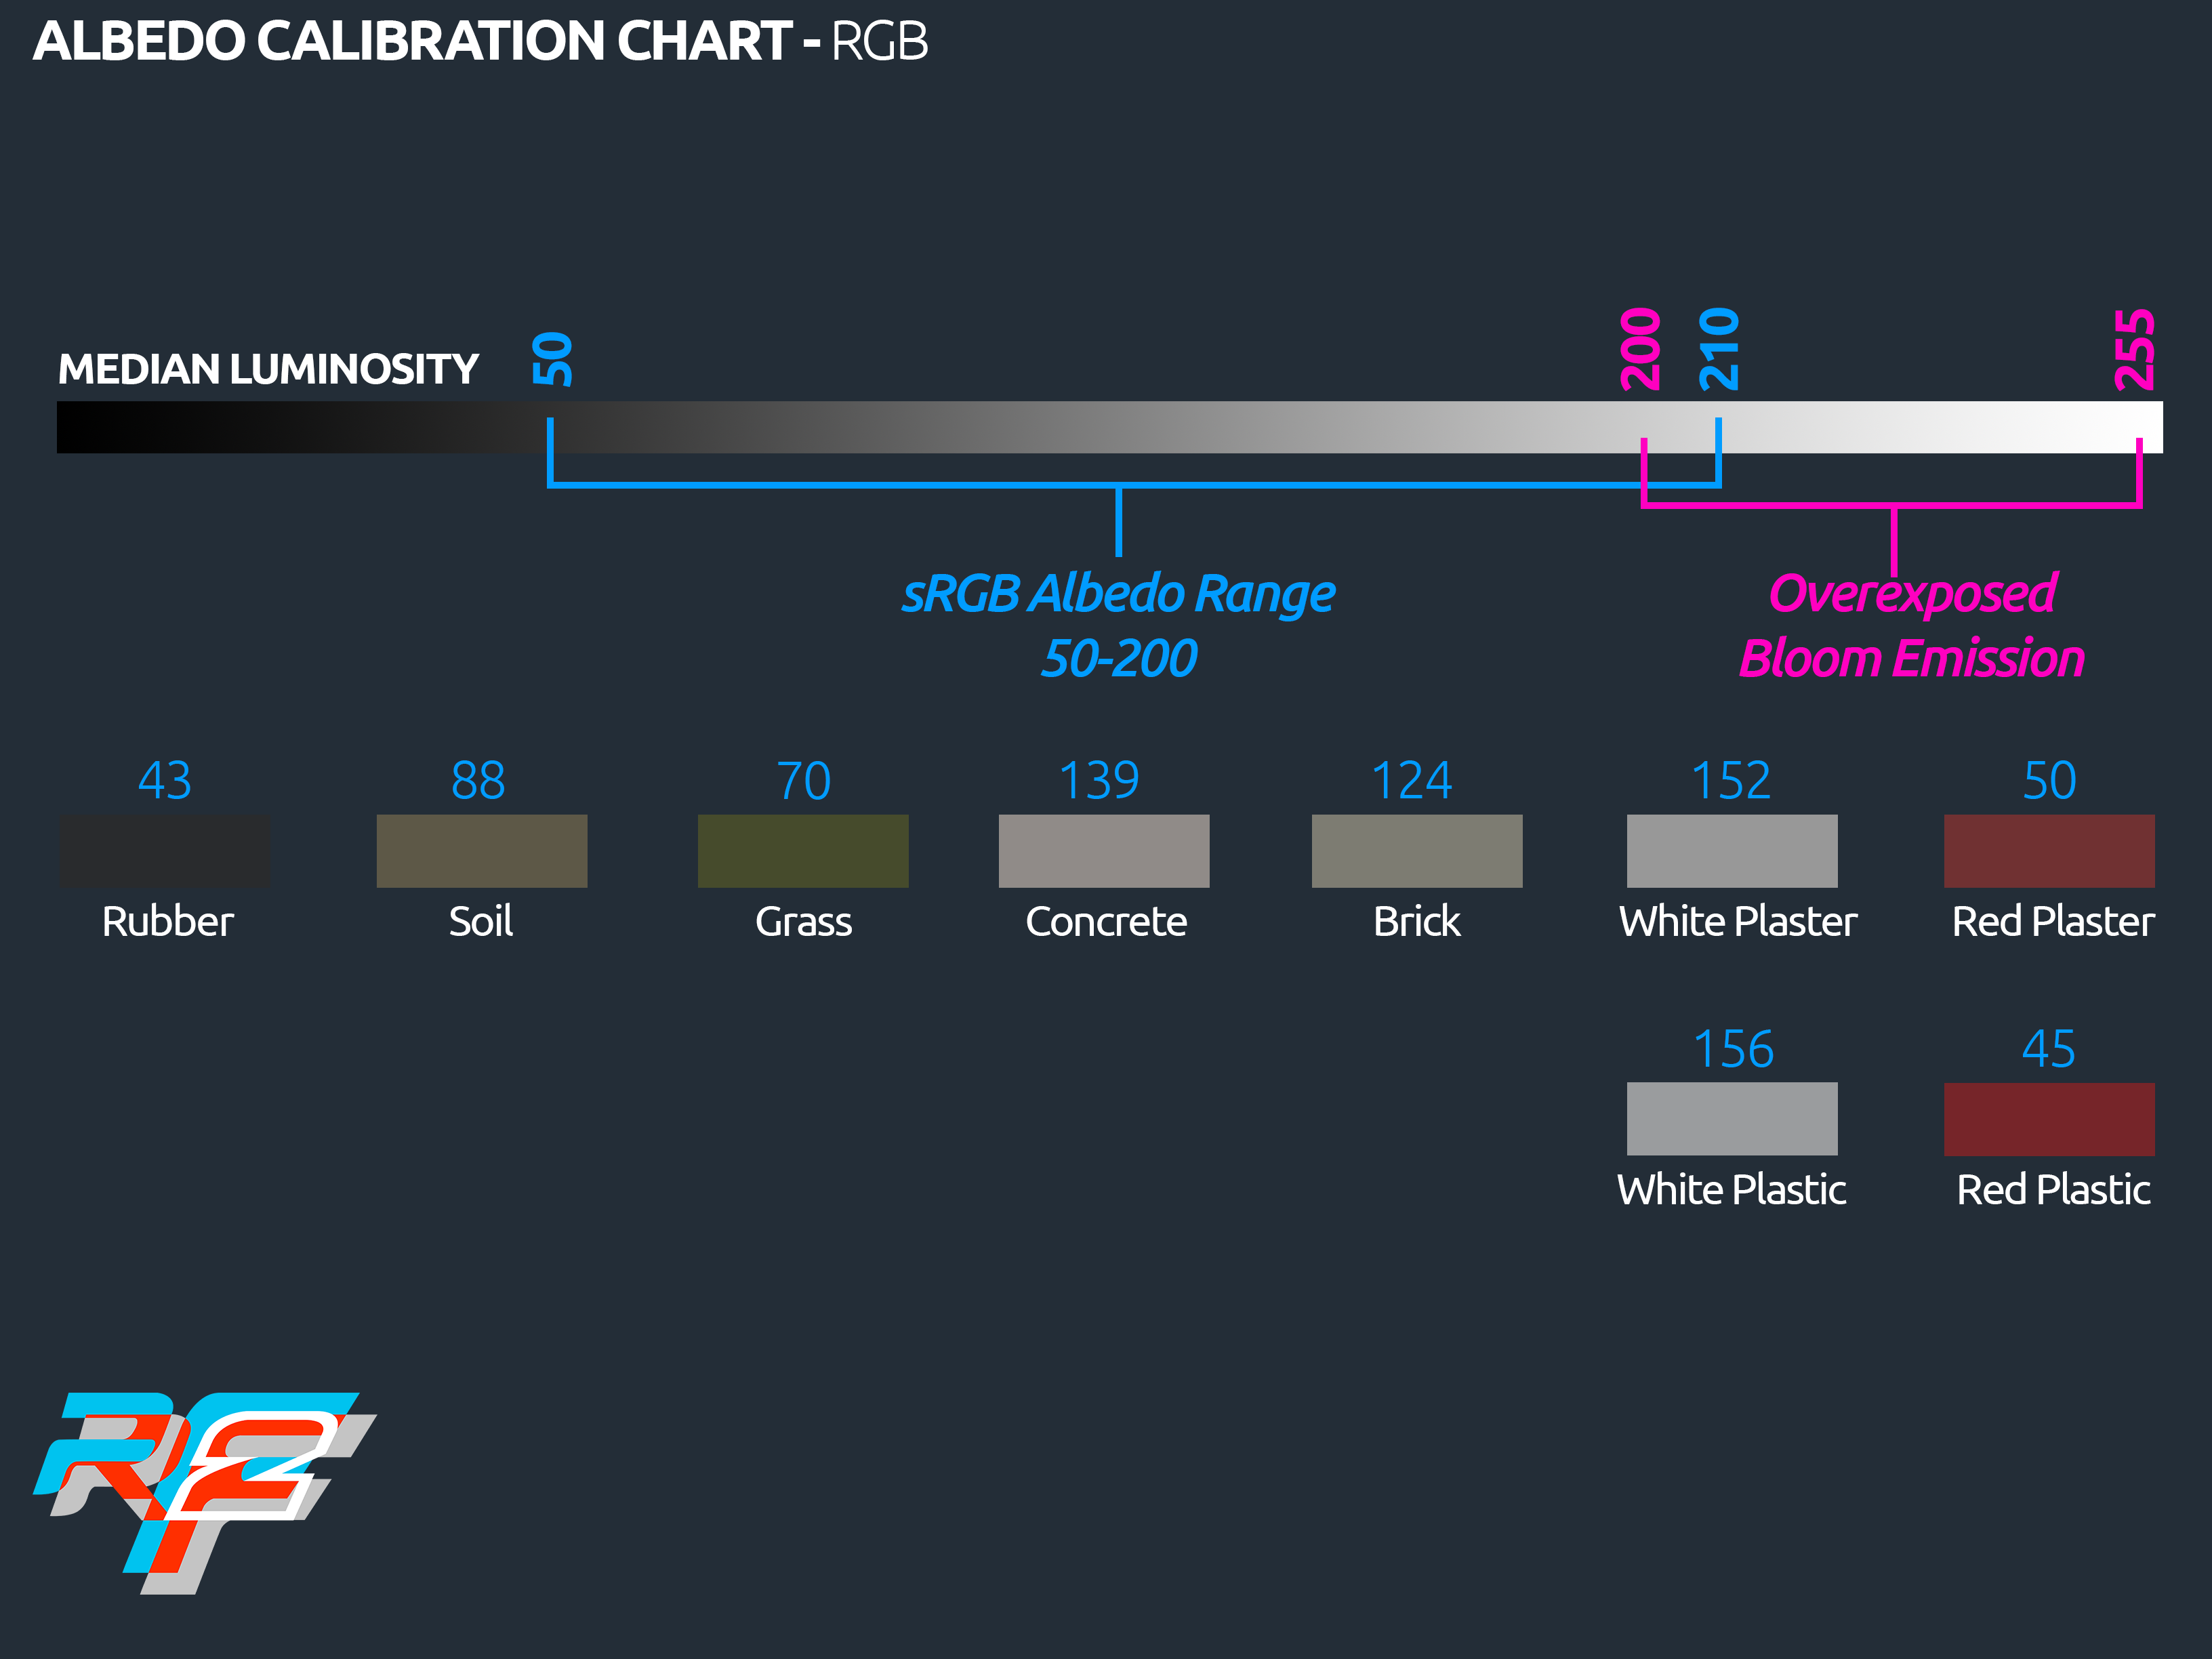
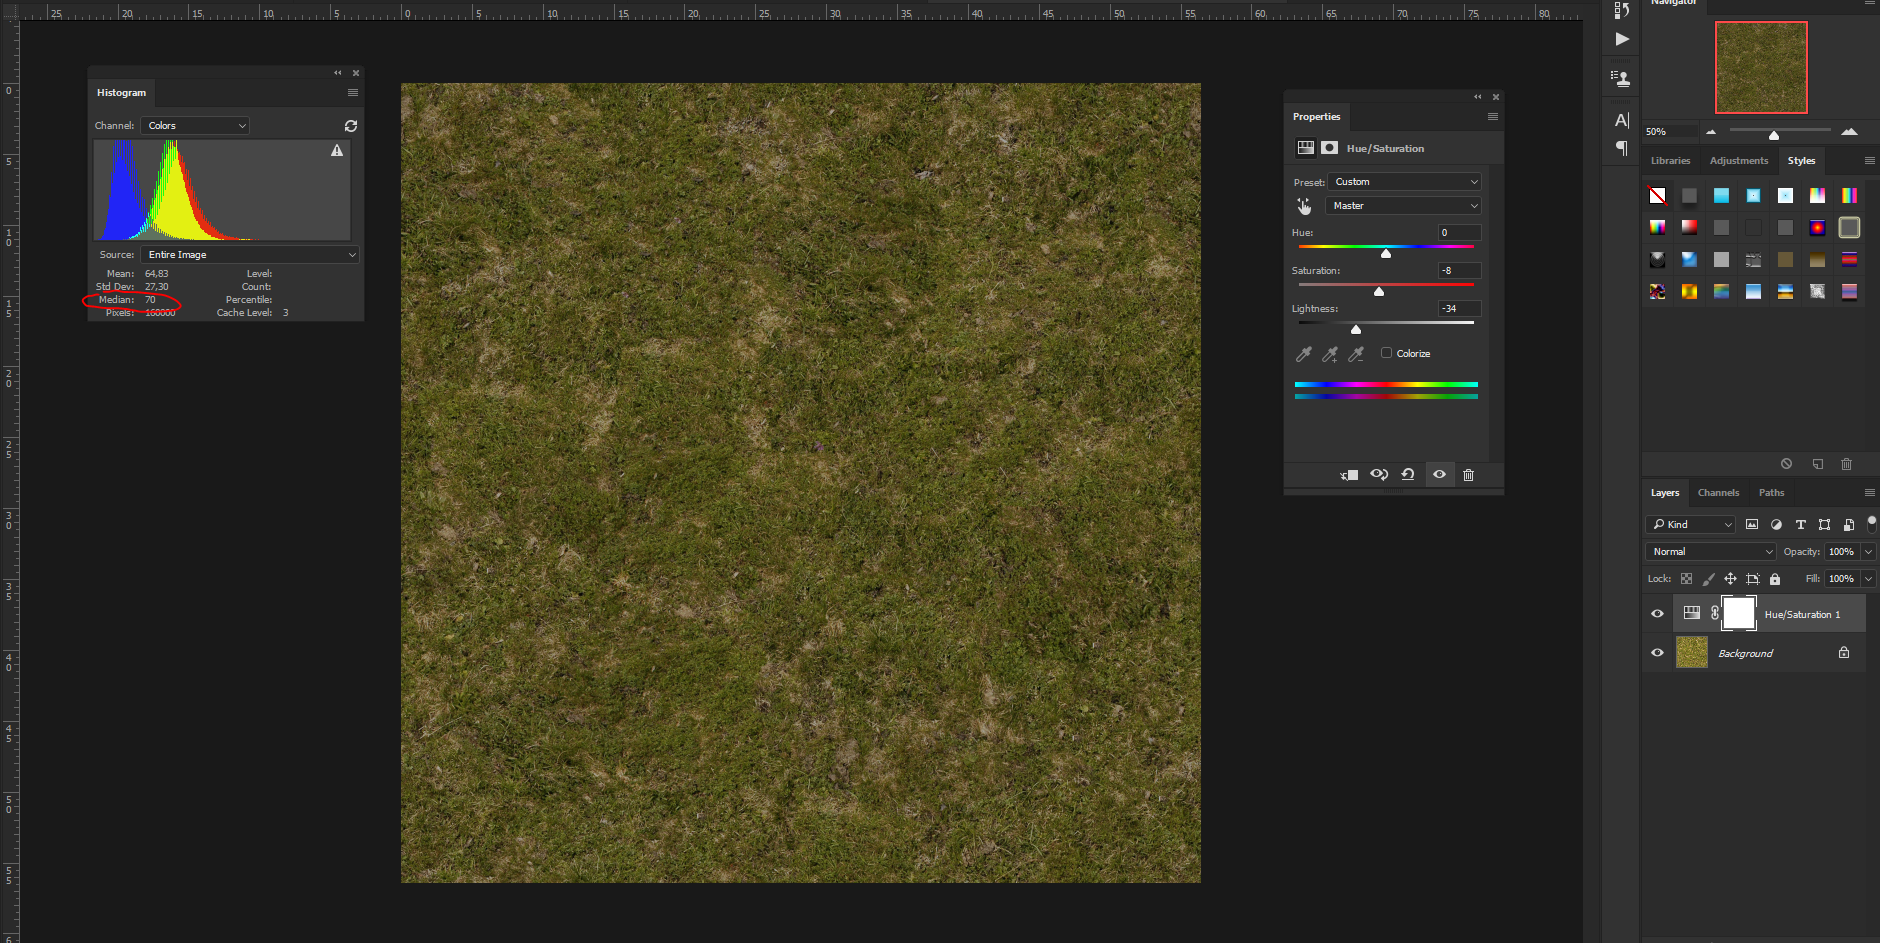
- Albedo maps are now mandatory; with the PostFX integration we are now forced to balance our diffuse maps to work as albedo maps (looks our wiki for any further reference). You now also have a basic Albedo chart that you can use to set your texture “median” levels.
- Track Lights; (See example); Create a mesh, with the shape of the bulb reflector (can be even a flat cap), and map it with the glow texture we provided in the sample, using the HighSunLum shader. Export this as glow mesh so it will be loaded when headlights are ON. Do Not Use any “fake” glow mesh or custom shader as we were doing in the past. It is VERY important to note that the size of the PostFX glow mesh has to be, at least, as big as the tracklight reflector bell outer ring. Do not create small mesh, unless you don’t want to simulate led lights, or specific shapes. If you want solid and strong headlight effect just be sure to create glow disks as big as your headlight reflector bells, on the outer and larger diameter.
- Semaphores/Starting Lights/Caution Lights (all low intensity bulbs); Use shaders with 100% Emissive Color – Diffuse map for the Light ON must be strong in terms of saturation and brightness to engage the bloom.
- Color Gamut; let’s limit the saturation and brightness of your albedo map, to average 85%, max 90 for pretty strong colors. Never use anything above that range. If you have old textures you want to quick fix, you can try applying a Level layer and dropping the OUT from 255 to 200.
- Normal Maps; normal maps are more data files than art, so they should be exported non-compressed to avoid glitches in the spatial/color information. We will give you all details about formats and schemes, once we moved to the engine optimization task.
- Atlas textures as much as you can; if you have many small texture with similar material attributes, try to atlas them into a singular material, averaging shader settings to a good compromise. This will improve performance reducing overall drawcalls.
- Try to use real time texture formats as much as you can; try to limit the usage of TGAs to just system/target files, and use .DDS/BC for the entire main art. We will give you a complete set of optimized DX11 texture format as soon as we move to the DX11 optimization task.
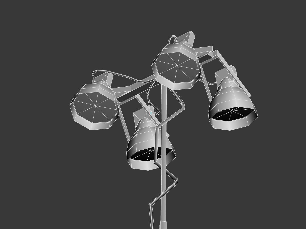
- Track Light example mesh, without the postFX glow mesh:
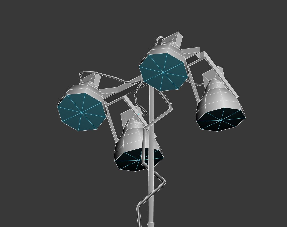
- Track Light example mesh, with the postFX glow mesh:
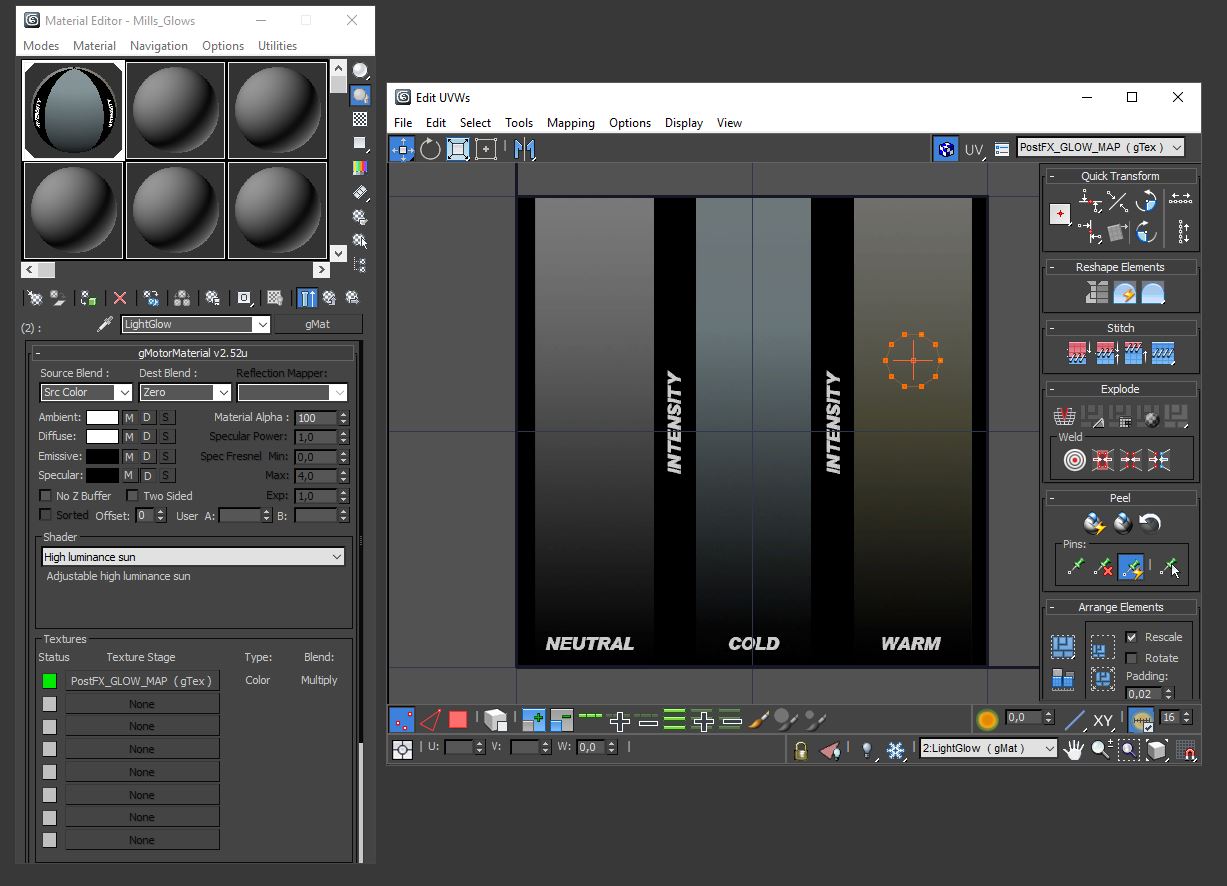
- Track Light example mesh UV, shader settings, and mapping. In that texture you can set different intensity and different color temperatures. For a nice touch, just set your track omnilights RGB colors, same as the texture area you pick on the texture.
- Track Light example mesh, export settings. Be sure your postFX glow mesh has same LOD Out as the main TrackLight mesh, so they will pop in the scene at the same time.

- Track Light example SCN code. The Instance for the glow mesh must have same suffix name as the first omnilight in the scene (in this case NightLight01)
Light=NightLight01
{
  Type=Omni Pos=(15.03, 9.14, -406.35) Range=(0.0, 40.0) Active=True Intensity=(4.5) Color=(255, 238, 193)
}
Instance=NightLight01Glow
{
  MeshFile=YOURGLOWMESHNAME.gmt CollTarget=False HATTarget=False
}
Art and Shader Calibration Chart
Basic 3D Studio Max Scene for Track Lights
Click to download the sample scene with track lights